Install Firestarter Firewall on Ubuntu - Step-by-Step Guide

Securing Ubuntu with Firestarter: A Step-by-Step Installation Guide
Firestarter is a user-friendly firewall solution designed for Ubuntu systems, featuring a graphical user interface (GUI) for simplified administration. Its installation process is remarkably straightforward, mirroring the ease of its operation. This guide details the necessary steps to install this powerful security tool.
Installation Procedure
To begin, open a terminal window on your Ubuntu system. Then, execute the following command:
sudo apt-get install firestarter
Once the installation completes, the firewall’s administration GUI can be accessed through the System menu, specifically under Administration, then Firestarter.
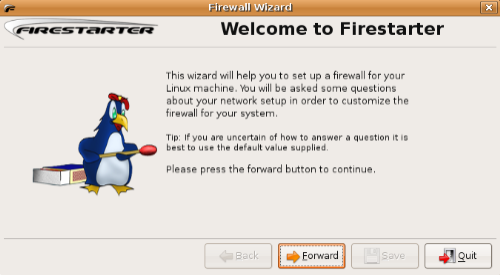
Upon the initial launch, a setup wizard will guide you through the configuration process. Proceed by clicking 'Forward'.
The wizard will then prompt you to select the network device. If your system utilizes DHCP to obtain an IP address automatically, ensure the corresponding checkbox is selected at this stage.

Continue through the wizard by clicking 'Forward' again. The final screen will be displayed, summarizing your selections.
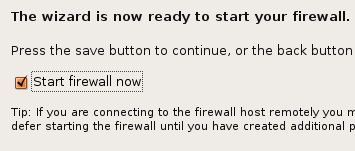
Confirm your settings by clicking the 'Save' button. This will bring you to the main Firestarter GUI.
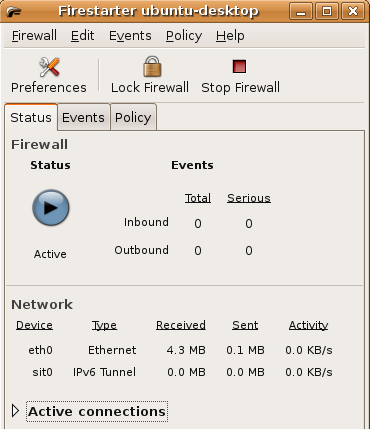
Accessing and Running Firestarter
The firewall can be managed via a tray icon, as illustrated below.

The Firestarter firewall will remain active even when the GUI is closed. However, to ensure automatic startup upon system boot, add the following command to your startup list:
sudo /usr/sbin/firestarter
Further guides detailing common firewall administration tasks will be published soon. Don't forget to subscribe to the RSS feed for updates!