Install AfterStep on Ubuntu Linux - Step-by-Step Guide

Installing and Exploring AfterStep on Ubuntu
The standard Ubuntu desktop environment utilizes the Gnome window manager. However, a variety of alternative window managers are available for installation, including options like KDE, Xfce, Blackbox, and Fluxbox.
The installation of AfterStep is a straightforward procedure. It’s important to ensure that you have enabled the necessary alternate installation repositories beforehand.
Installation Command
To begin, open a terminal window and execute the following command:
sudo apt-get install afterstep
Upon completion of the installation process, proceed to log out. Then, locate and click the "Options" button situated in the bottom-left corner of the screen.
Selecting AfterStep
A menu will appear, displaying a list of all window managers currently installed on your system. From this menu, choose AfterStep to initiate the login process.
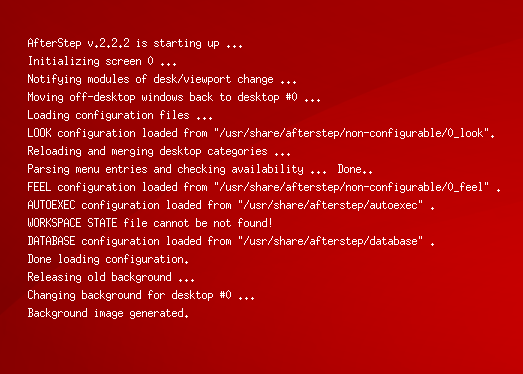
During the initial login, you will observe a screen indicating that AfterStep is configuring your system.
The AfterStep Environment
AfterStep presents a rather detailed and comprehensive environment. Once logged in, a left-click on the desktop will reveal the root menu, providing access to launch other applications.
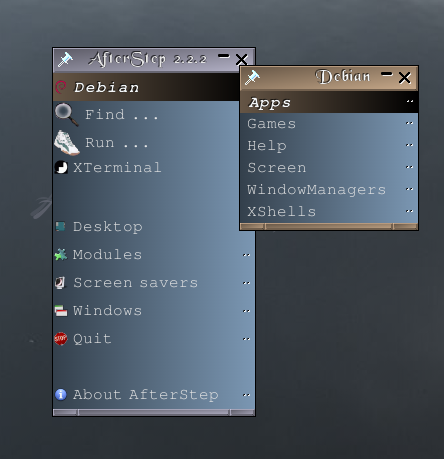
A launch bar is also present, offering quick shortcuts to frequently used programs.

AfterStep Widgets and Applets
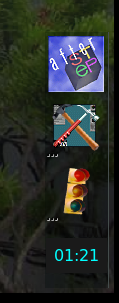
In the lower-right corner of the screen, you’ll find the AfterStep widgets, which can also be referred to as applets.
Here is a complete view of the AfterStep desktop:

Further details regarding AfterStep can be located on its official homepage.